Purpose of this document
CloudForms and ManageIQ make it easy to customize the User Interface to add additional capabilities not provided out of the box. For the end user, these Custom Buttons are integrated into the User Interface and are not distinguishable from out of the box features.
Ansible Playbooks can either used directly with the embedded Ansible feature or an external Ansible Tower Server can be configured as a provider and Job Templates configured there, can be executed. A recent Mini Series on Ansible Buttons in CloudForms 4.6 gives some details on how to use the embedded Ansible capabilities. This blog post will focus on how to use an existing Ansible Tower and its Job Templates from a Button.
Requirements
An Ansible Tower has to be setup and installed first. At least one Job Template is required which can be executed from a Button. Instructions on how to add an Ansible Tower Provider into CloudForms can be found in the Red Hat Product Documentation.
When creating the Job Template in Tower, meet the following requirements:
-
enable “prompt on launch” for Limit parameter: if this check box is not enabled, the Limit parameter sent via the API is ignored and the Job will be executed on the entire inventory
-
enable “prompt on launch” for extra variables: again, if this box is not checked, extra variables sent via the API are ignored by Ansible Tower
-
the “hosts” section in the playbook should be set to “all”: since the Job Template already references an inventory and the Limit parameter is set correctly by CloudForms, it’s usually save to set this to “all”
-
optionally: use the CloudForms dynamic inventory feature in Ansible Tower to make sure the two inventories are always in sync
Creating a Service Dialog
Most Job Templates require user input and ask for values of extra variables. These forms are called “Service Dialogs” in CloudForms and can automatically be generated after adding an Ansible Tower Provider.
-
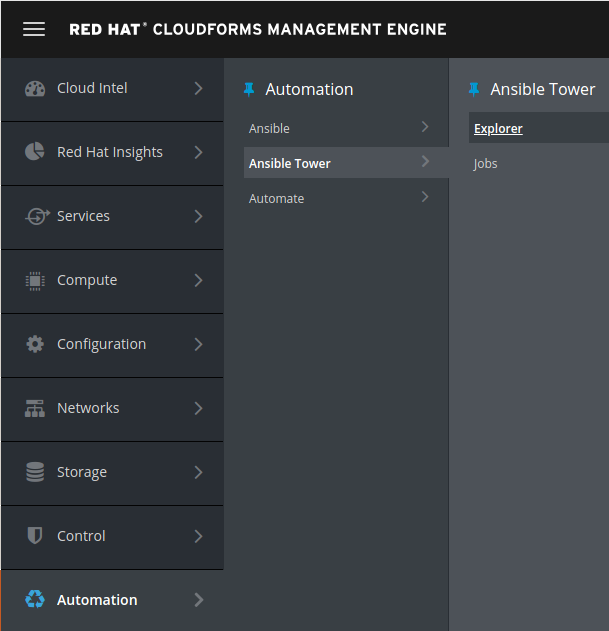
Navigate to Automation -> Ansible Tower -> Explorer
![navigate to Tower Explorer]()
-
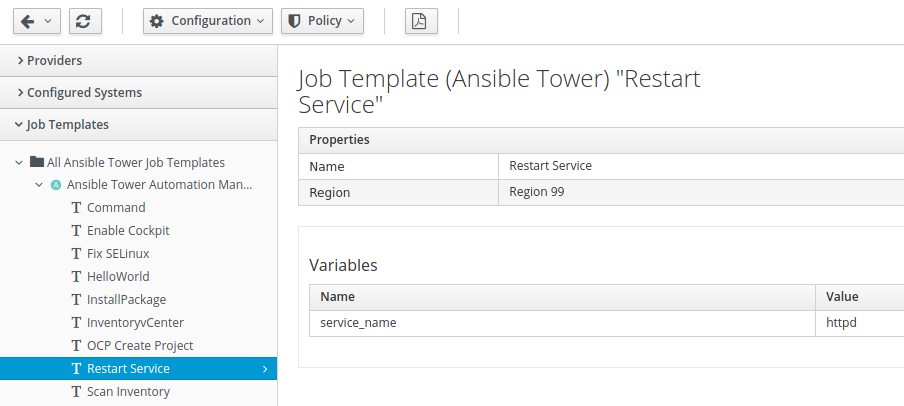
Click on Job Templates and select the appropriate Job
![select tower job]()
-
Click on Configuration -> Create Service Dialog from Job Template
-
Enter a name and click on Save
The resulting Service Dialog can be verified by navigating to Automation -> Automate -> Customization and then clicking on Service Dialogs in the accordion on the left.
The Service Dialog can be edited to make it more user friendly.
Note: Do not remove or change the automatically added “limit” element. If the Service Dialog is only used with Custom Buttons, it’s save to “hide” the element though. If the element is removed or renamed, the Limit parameter will not be sent via the REST API to Ansible Tower and the Playbook will run on the entire inventory.
Create the Button Group
To be able to add a custom Button to the User Interface, at least one Button Group has to be created first. The Button Group and Buttons can be assigned to many objects. These instructions will describe how to assign it to a Virtual Machine.
-
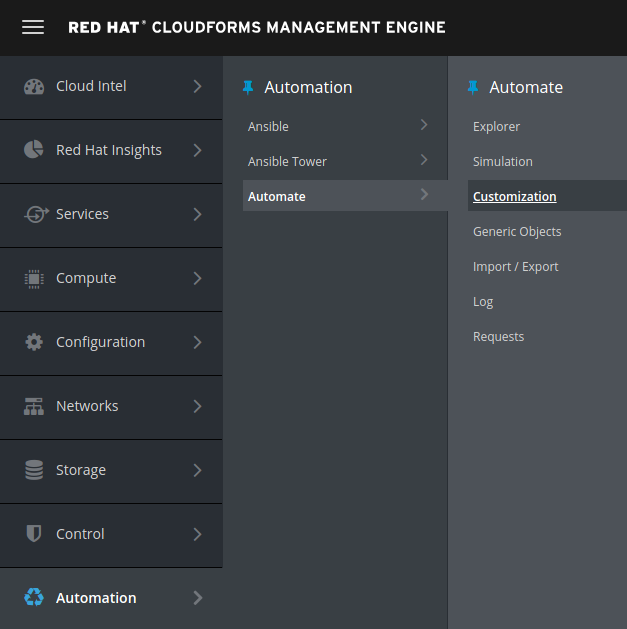
Navigate to Automation -> Automate -> Customization
![navigate to customization]()
-
Click on Buttons in the accordion on the left
-
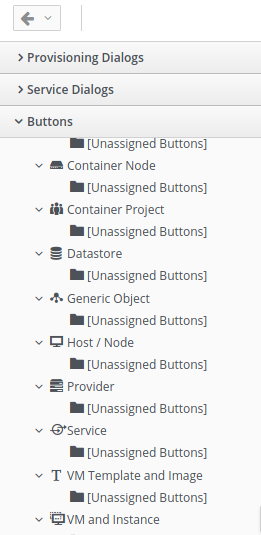
Select VM and Instance in the tree
![select VM and instance]()
-
Click on Configuration and Add a new Button Group
-
Enter at Text and a Hover Text. The Hover Text will be shown when the user moves the mouse pointer over the icon. Choose and Icon and optionally change its color.
-
Click Add
Create a Custom Button
Last but not least create a Custom Button and assign it to the Button Group.
-
Click on the Button Group created in the last step
-
Click on Configuration -> Add a new Button
-
Don’t change the “Button Type” and leave it set to “Default”
-
Provide a Text and a Hover Text. The Hover Text will be shown when the user moves the mouse pointer over the icon.
-
Select an Icon and optionally change its color
-
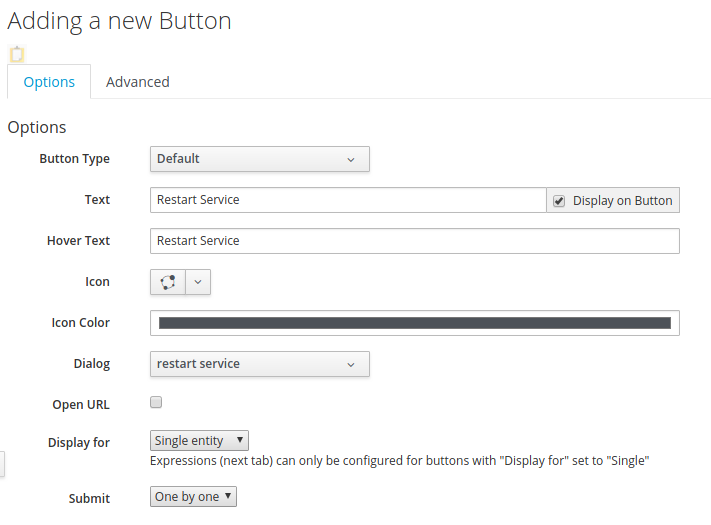
Click on Dialog and select the Service Dialog created in the earlier step
-
Leave all other options set to defaults on this page
![custom button options]()
-
Switch to the Advanced tab
Details on how to use Visibility and Enablement can be found in the Blog Post Ansible Custom Buttons in CloudForms (Part 2 creating the button)
-
Scroll down to the Object Details Section and use “ansible_tower_job” in the Requests field
-
Scroll down to Attribute/Value Pairs
Enter “job_template_name” into the field on the left and the exact name of the Ansible Tower Job in the field on the right. In this case, the Job is called “Restart Service”
![provide job tempate name]()
-
Click Add to save the Button

Verify the results
To make sure everything worked as expected, verify the results.
-
Navigate to a Virtual Machine by clicking on Compute -> Infrastructure -> Virtual Machines
-
Note the new Button Group
![button group demo with hover text]()
Note: The Button Groups “Tools” and “CMDB” shown in this screenshot are customizations as well and not out of the box.
-
After clicking on the Button Group, the new Button will appear
![custom button with hover text]()
-
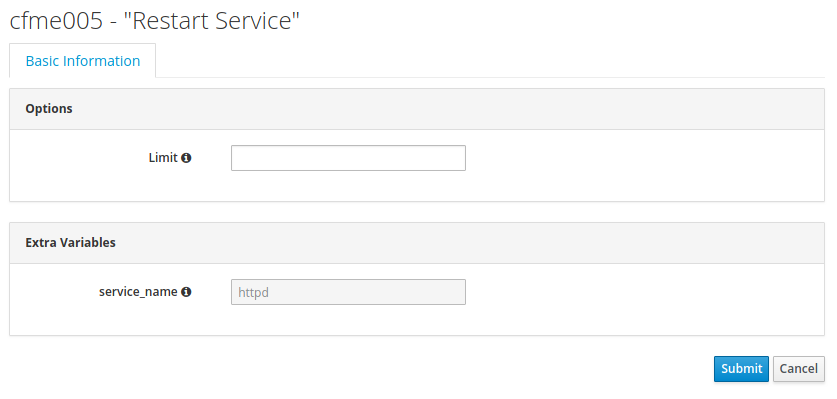
After clicking on the Custom Button, the associated Service Dialog will be shown
![restart Service Dialog]()
-
Leave the field Limit empty, it will automatically be populated by CloudForms
-
After a short delay of a few seconds, you should see the Job being executed on Ansible Tower.
![Ansible Tower Job output]()
Note: The extra variable was populated as entered into the Service Dialog when executing the Button. The Limit parameter was also automatically set to the selected Virtual Machine.
-
After the Job completed, you will also find some data in *Automation -> Ansible Tower -> Jobs


Disclaimer
All Screenshots have been taken from CloudForms 4.6, which is the latest release at the time of writing. Nevertheless everything should work the same way with ManageIQ, only the UI theme looks slightly different.